I’ve been obsessed with embroidery for years. The tierno stitch rosa dibujo is one of those techniques that can really make your work stand out. But let’s be real, it’s not the easiest thing to master.
You might have tried a few times and gotten frustrated. I know I did. So, I decided to break it down in a way that’s actually helpful.
No more vague instructions or confusing diagrams, and just clear, step-by-step guidance. Trust me, if you follow along, you’ll get it.
And once you do, you’ll wonder how you ever managed without it.
Understanding the Tierno Stitch Rosa Dibujo
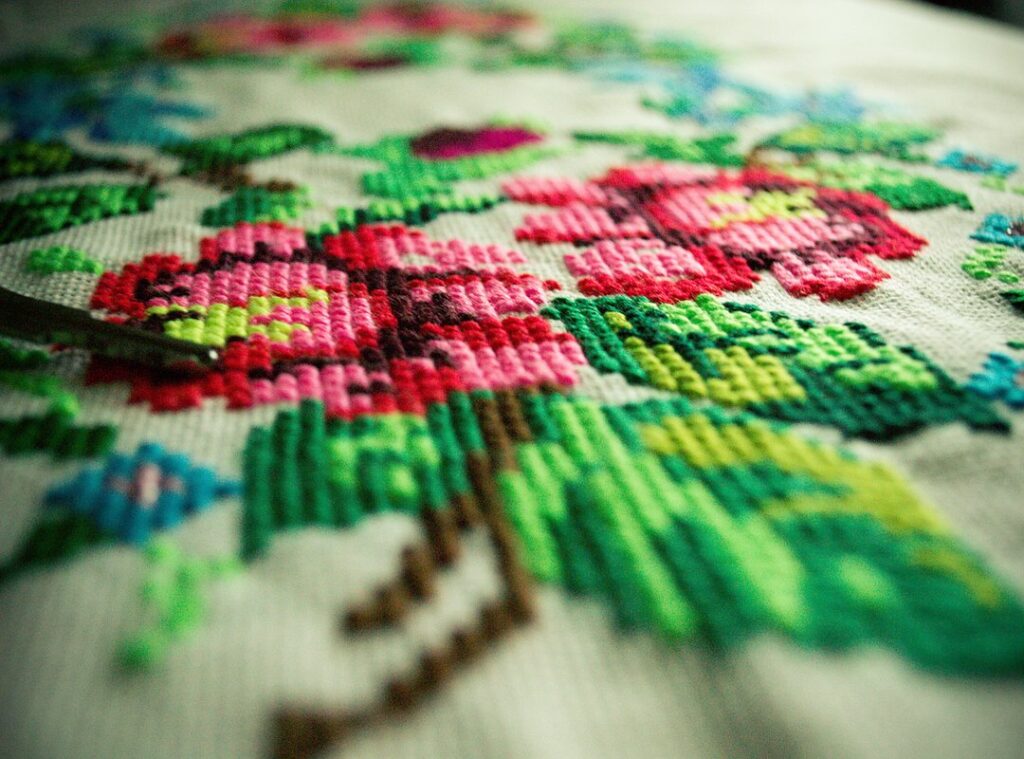
What is the tierno stitch rosa dibujo and why should you care? It’s a unique embroidery technique that adds a special touch to any project. The stitch is known for its intricate, floral patterns and delicate appearance.
Historically, this stitch has roots in traditional embroidery practices. It’s been passed down through generations, often used in decorative clothing and home textiles. The cultural significance lies in its ability to preserve and celebrate heritage.
Now, let’s talk materials, and here’s what you need:
- Embroidery floss
- Embroidery needle
- Fabric (like linen or cotton)
- Embroidery hoop
- Scissors
These tools are essential for getting started. With the right materials, you can create beautiful, detailed designs that stand out.
How to Execute the Tierno Stitch Rosa Dibujo
If you’re looking to add a unique and intricate touch to your embroidery, the Tierno stitch rosa dibujo is a fantastic choice. Let’s dive into how you can master this beautiful technique.
First, gather your materials. You’ll need a needle, embroidery floss, and a piece of fabric. Make sure your fabric is taut in a hoop for easier stitching.
- Thread your needle with the embroidery floss.
- Bring the needle up through the fabric at your starting point.
Now, here’s where it gets interesting. The key to the Tierno stitch rosa dibujo is in the looping and crossing of the threads.
Start by making a small straight stitch. Then, bring the needle back up through the fabric, just a little bit away from the end of the first stitch. Loop the thread around the needle before pulling it through.
This creates the first loop.
Next, make another small straight stitch next to the first one. Loop the thread around the needle again and pull it through. Repeat this process, moving in a circular pattern to create the rosa (rose) shape.
It’s important to keep your stitches consistent. Uneven stitches can make your rosa look lopsided. Take your time and be patient.
Common mistakes include:
* Pulling the thread too tight, which can distort the fabric.
* Not keeping the loops consistent, leading to an uneven appearance.
* Using too many strands of floss, which can make the stitch bulky and hard to manage.
To troubleshoot, if you find your stitches are too tight, try using fewer strands of floss or loosening your grip on the thread. If your loops are inconsistent, practice on a scrap piece of fabric until you get the hang of it.
With a bit of practice, you’ll be able to create stunning Tierno stitch rosa dibujo designs that will add a special touch to any embroidery project.
Practical Examples and Projects
Let’s dive into some real-world projects that use the Tierno stitch rosa dibujo. You might be surprised by how versatile this stitch can be.
For instance, a friend of mine used it to create a beautiful table runner. The intricate pattern added a touch of elegance to her dining room. Another project I saw was a set of pillowcases.
The stitch gave them a unique, handcrafted look.
If you’re just starting out, consider making a small pouch or a bookmark. These are great for practicing and getting a feel for the stitch. Once you’re more comfortable, you can move on to larger projects like a quilt or a wall hanging. Fhthfoodcult
Incorporating the Tierno stitch rosa dibujo into your own designs can be a lot of fun. Try mixing it with other stitches to create something truly unique. For example, you could use it as a border in a blanket or as a focal point in a piece of wall art.
Remember, the key is to experiment and see what works best for you. Don’t be afraid to try new things and make mistakes. That’s how you learn and grow as a crafter.
Frequently Asked Questions (FAQs)

Q1: What are the best fabrics to use for the Tierno stitch rosa dibujo?
Cotton and linen are great, and they’re smooth and hold the stitches well. Silk can work too, but it’s a bit trickier.
Q2: Can beginners learn this stitch, or is it only for advanced embroiderers?
Beginners can definitely learn it. It might take some practice, but it’s not as hard as it looks. Just start with simple designs and go from there.
Q3: Are there any specific threads that work best for this technique?
Sure, and cotton floss is the go-to. It’s easy to handle and comes in a variety of colors.
Silk threads can add a luxurious touch, but they’re more delicate and require more care.
Q4: How long does it take to master the Tierno stitch rosa dibujo?
It depends on how much you practice. Some people get it in a few weeks. Others might take a couple of months.
Consistency is key.
Q5: Where can I find more resources and tutorials on this embroidery technique?
Check out local craft stores, online forums, and YouTube. There’s a ton of free content out there. Books and online courses are also great if you want a more structured approach.
Advanced Techniques and Variations
Alright, you’ve got the basics down. Now, let’s really take your tierno stitch rosa dibujo to the next level.
First, try varying the tension. Tighter stitches give a more defined, crisp look. Looser ones create a softer, more flowing effect.
What about color, and experiment with different shades. A subtle gradient can add depth and dimension to your design.
Combining with Other Stitches: Mix it up! Try integrating the Tierno stitch rosa dibujo with cross-stitch or French knots. This creates a rich, textured look that stands out.
Pro tip: Use a finer thread for intricate details. It makes all the difference in those small, delicate areas.
Perfecting Your Embroidery Skills
Recap the key points covered in the guide, including the definition, steps, and practical applications of the tierno stitch rosa dibujo. Consistent practice and patience are essential in mastering this embroidery technique. Embrace the journey and refine your skills over time.
Experiment and create your own unique designs using the tierno stitch rosa dibujo. Let your creativity flow and enjoy the process.
 There is a specific skill involved in explaining something clearly — one that is completely separate from actually knowing the subject. Norah Porteranaz has both. They has spent years working with well curated recipes in a hands-on capacity, and an equal amount of time figuring out how to translate that experience into writing that people with different backgrounds can actually absorb and use.
Norah tends to approach complex subjects — Well Curated Recipes, More, Regional Culinary Traditions being good examples — by starting with what the reader already knows, then building outward from there rather than dropping them in the deep end. It sounds like a small thing. In practice it makes a significant difference in whether someone finishes the article or abandons it halfway through. They is also good at knowing when to stop — a surprisingly underrated skill. Some writers bury useful information under so many caveats and qualifications that the point disappears. Norah knows where the point is and gets there without too many detours.
The practical effect of all this is that people who read Norah's work tend to come away actually capable of doing something with it. Not just vaguely informed — actually capable. For a writer working in well curated recipes, that is probably the best possible outcome, and it's the standard Norah holds they's own work to.
There is a specific skill involved in explaining something clearly — one that is completely separate from actually knowing the subject. Norah Porteranaz has both. They has spent years working with well curated recipes in a hands-on capacity, and an equal amount of time figuring out how to translate that experience into writing that people with different backgrounds can actually absorb and use.
Norah tends to approach complex subjects — Well Curated Recipes, More, Regional Culinary Traditions being good examples — by starting with what the reader already knows, then building outward from there rather than dropping them in the deep end. It sounds like a small thing. In practice it makes a significant difference in whether someone finishes the article or abandons it halfway through. They is also good at knowing when to stop — a surprisingly underrated skill. Some writers bury useful information under so many caveats and qualifications that the point disappears. Norah knows where the point is and gets there without too many detours.
The practical effect of all this is that people who read Norah's work tend to come away actually capable of doing something with it. Not just vaguely informed — actually capable. For a writer working in well curated recipes, that is probably the best possible outcome, and it's the standard Norah holds they's own work to.